Install wheels
Wheels are a key component of the Python packaging ecosystem, enabling efficient and reproducible installation of Python packages. Databricks supports...
Wheels are a key component of the Python packaging ecosystem, enabling efficient and reproducible installation of Python packages. Databricks supports installing Python wheel (.whl) files through cluster‑scoped or job‑scoped libraries. In this guide, the recommended approach is cluster initialization via requirements.txt, which is ideal for:
- Shared clusters
- Reproducible environments
- CI/CD-managed deployments
Step 1: Upload the wheel file to a shared location
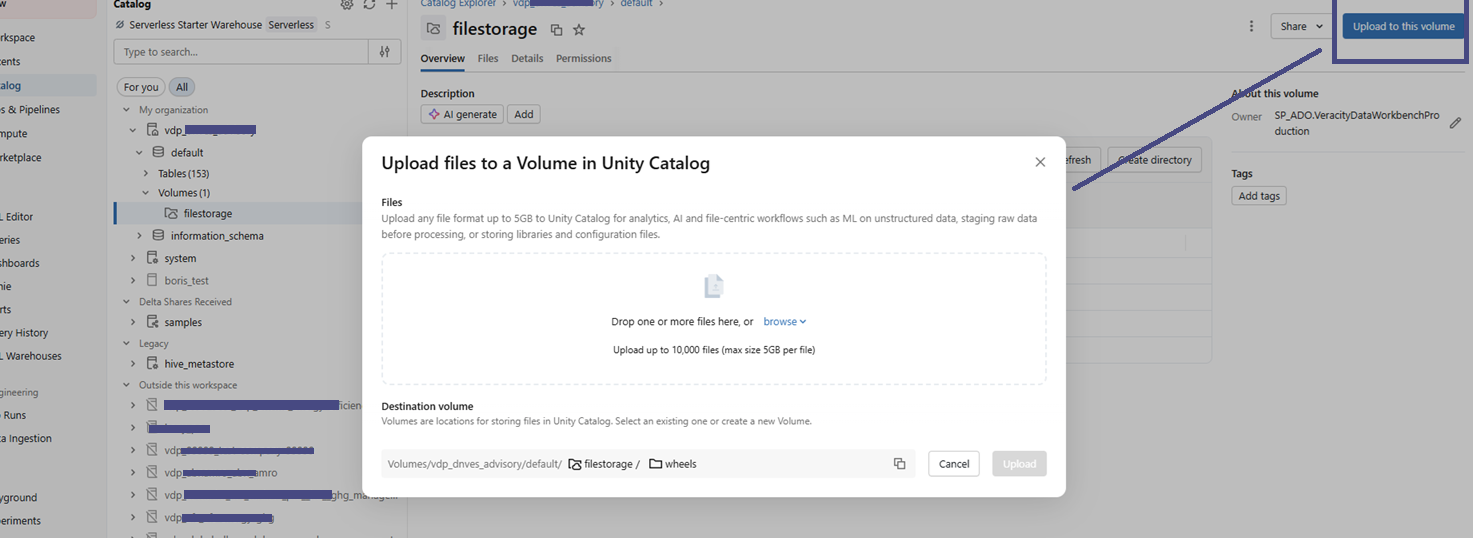
Wheel files can be uploaded to a Unity Catalog Volume either manually or through automated CI/CD pipelines. Upload the file to a designated folder in File storage:
/Volumes/<catalog>/<schema>/<volume>/wheels/
For example: /Volumes/vdp_veracity_testing/default/filestorage/wheels/
Manually upload the wheel file to Unity Catalog volume
CI/CD automatically upload the wheel file to Unity Catalog volume
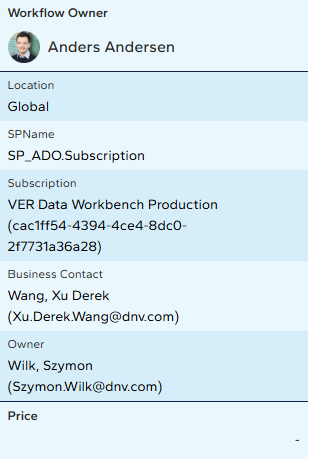
- Create Service Principal (Application) in Verit Store SPName: Custom define your SP Name
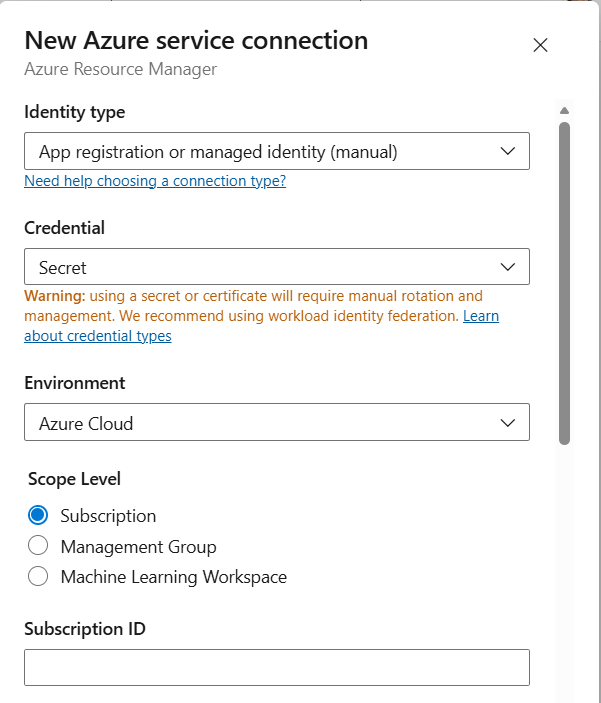
- Create service connection in Azure DevOps
- Contact @<Li, Li Na Lina> OR @<Fakhry, Hany (DNV External)> to grant the service principal permission on the Databricks side.
- Create tasks in the Azure DevOps deployment YAML file.
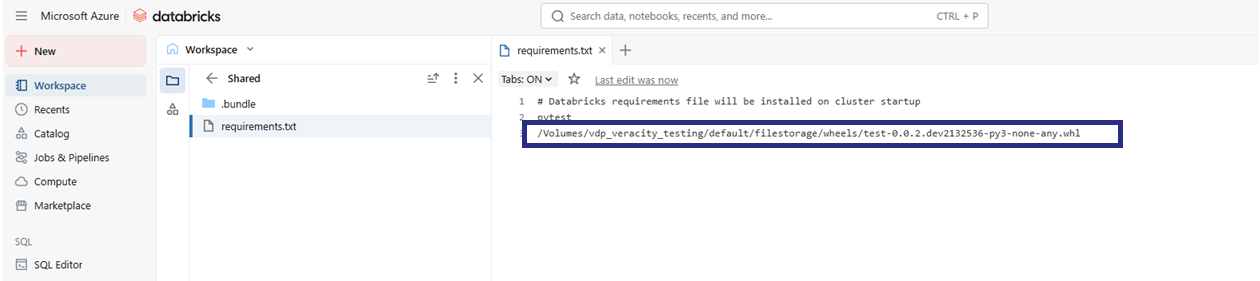
Step 2: Add the wheel path to requirements.txt
Edit the requirements.txt file located at /Workspace/Shared/requirements.txt and include the full path to the wheel file:
/Volumes/<catalog>/<schema>/<volume>/wheels/<package_name>.whl
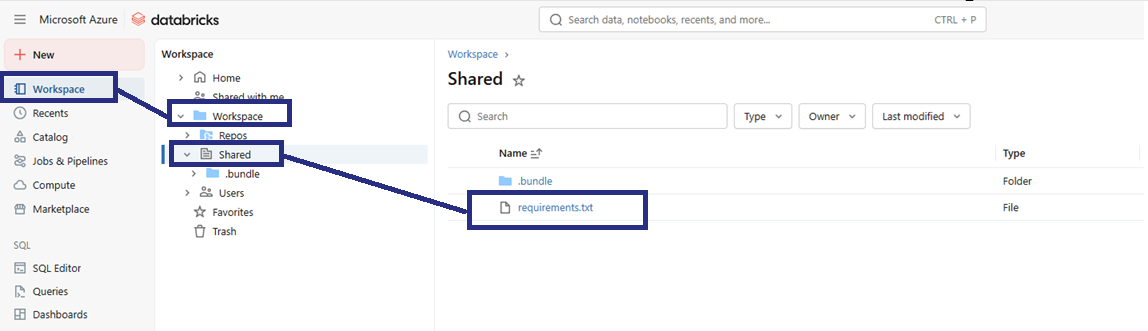
In this example the path is /Volumes/vdp_veracity_testing/default/filestorage/wheels/test-0.0.2.dev2132536-py3-none-any.whl
Step 3: Restart the cluster or compute
Restart the shared or job cluster to trigger installation. Databricks automatically installs the wheel defined in requirements.txt during startup.