Create a report with DW Uploaded data sets and upload in VAP
You can use an Uploaded data set from Data Workbench in a Power BI report and then upload the report in VAP. Start by generating a SAS token for the data set.
You can use an Uploaded data set from Data Workbench in a Power BI report and then upload the report in VAP. Start by generating a SAS token for the data set.
For data set concepts, types, and the definition of "Uploaded" data sets, go here.
To generate an access token for an Uploaded data set
You can generate access keys from the Data Workbench UI or with an API call. Access keys must have an expiry date. You can optionally enable auto renew in VAP.
The "Key" generated in Data Workbench is the same as the SAS Token used in VAP. You will paste it in the Credential field when editing the resource.
Using the Data Workbench UI
- Open your Data Workbench workspace.
- Go to Data Catalogue > Created data sets.
- Choose a data set whose Type is Uploaded.
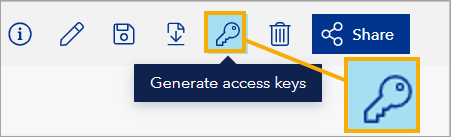
- Open the data set and in the top right corner select Generate access keys.
- Under Set access level, select Read.
- Under Set access end, select the expiry date and time.
- Select Generate key, then Copy key.
With an API call
Call the endpoint /workspaces/{workspaceId}/data sets/{data setId}/sas, authenticate, and provide:
{workspaceId}as UUID{data setId}as UUIDdurationInMinutesas int32typeset todfs
For details, check the Data Workbench API specification.
In Data Workbench, when you open a data set, you can read the following from its URL path:
workspaceId(comes afterws/)data setId(comes afterdatasets/)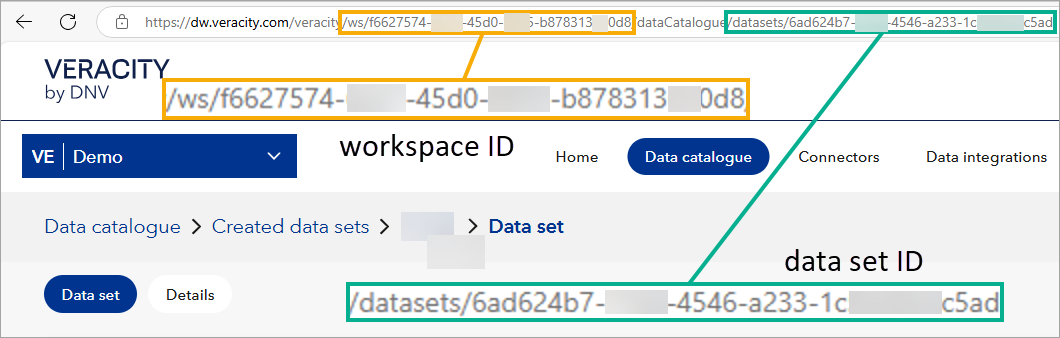
Connect the Uploaded data set in Power BI Desktop
Do not use the "Web" data connector for Uploaded data sets, as this results in an empty data set.
- Open Power BI Desktop.
- Select Get Data > Azure > Azure Data Lake Storage Gen2.
- In the connection window:
- URL: paste the part of the SAS URL that is before the
?. - Authentication method: select Shared access signature (SAS).
- Token: paste the part of the SAS URL that starts with
?, including?.
- URL: paste the part of the SAS URL that is before the
Load and transform data
- After the connection succeeds, Power BI shows the data set contents.
- Select Transform Data to open Power Query.
- Make any adjustments, then select Close & Apply.
Save and upload the Power BI file in VAP
- Build visuals and save the file as
.pbix. - In VAP, upload the Power BI file as a Resource File.
- If the data source shows a connection error, select Edit on the resource file and set:
- Data Source Sub Type to
DWB Structured Data Set. - Paste the SAS token into Credential.
- Select Update to apply the token.
- Select the refresh icon to validate the connection.
- Wait for "Connect to data source successfully."
- Select Save.
- Data Source Sub Type to
Remember: The SAS Token you paste in Credential is the same as the Key generated in Data Workbench.
Optional: Enable auto renew of SAS token in VAP
- In the Edit Resource File screen, toggle Auto Renew SAS Token to ON.
- Ensure both Data Workbench Workspace ID and Data Set ID are filled in.
- Select Save.
If either ID is missing, auto renew will not work.
Optional: Use a parameter to store the token in Power BI Desktop
VAP currently has no UI to set parameters, but you can still organize your .pbix using a parameter.
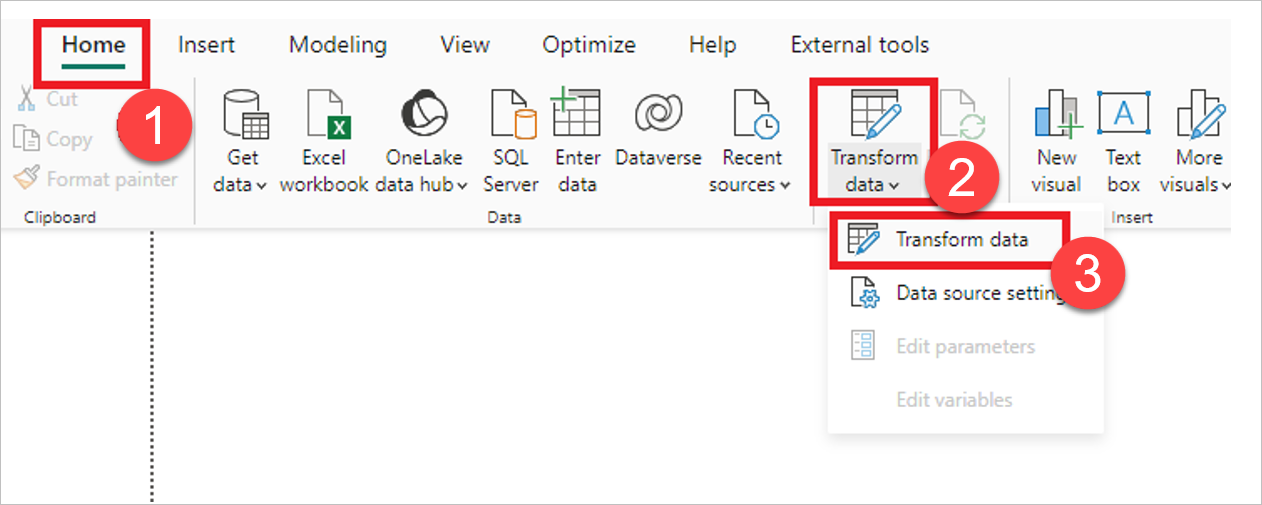
- In Home, select Transform data > Transform data.
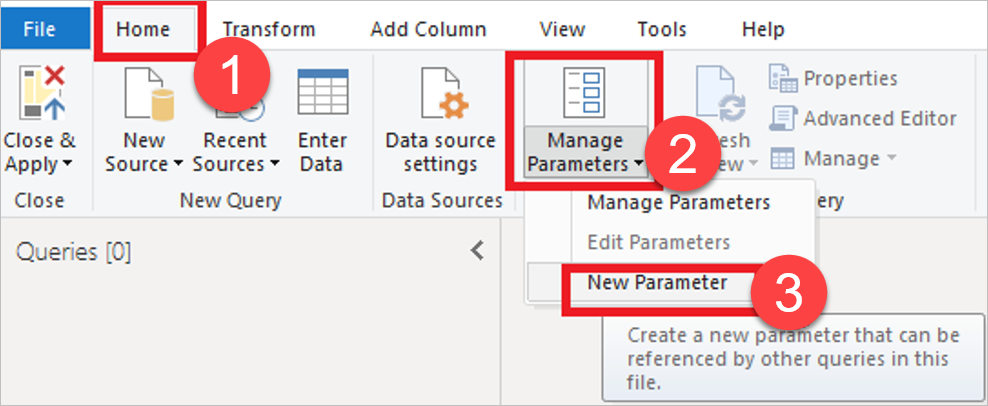
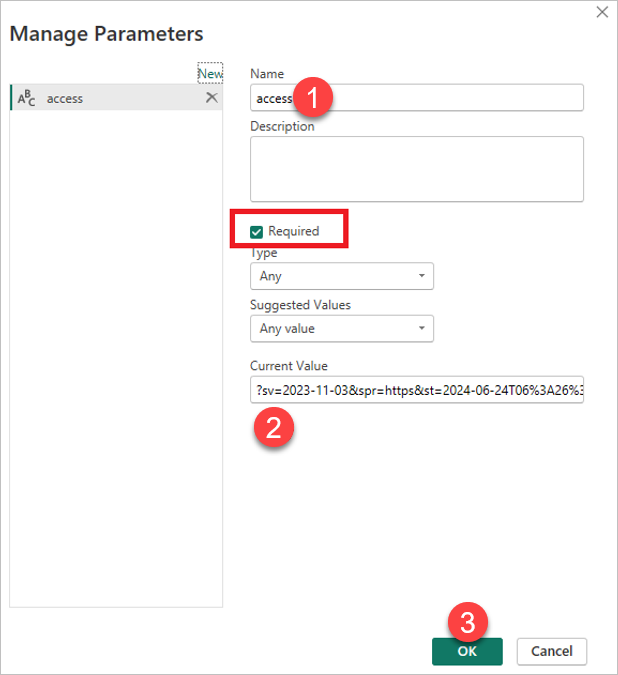
- In Manage Parameters, select New Parameter.
- Name the parameter and set Current Value. Ensure Required is checked, then select Ok.
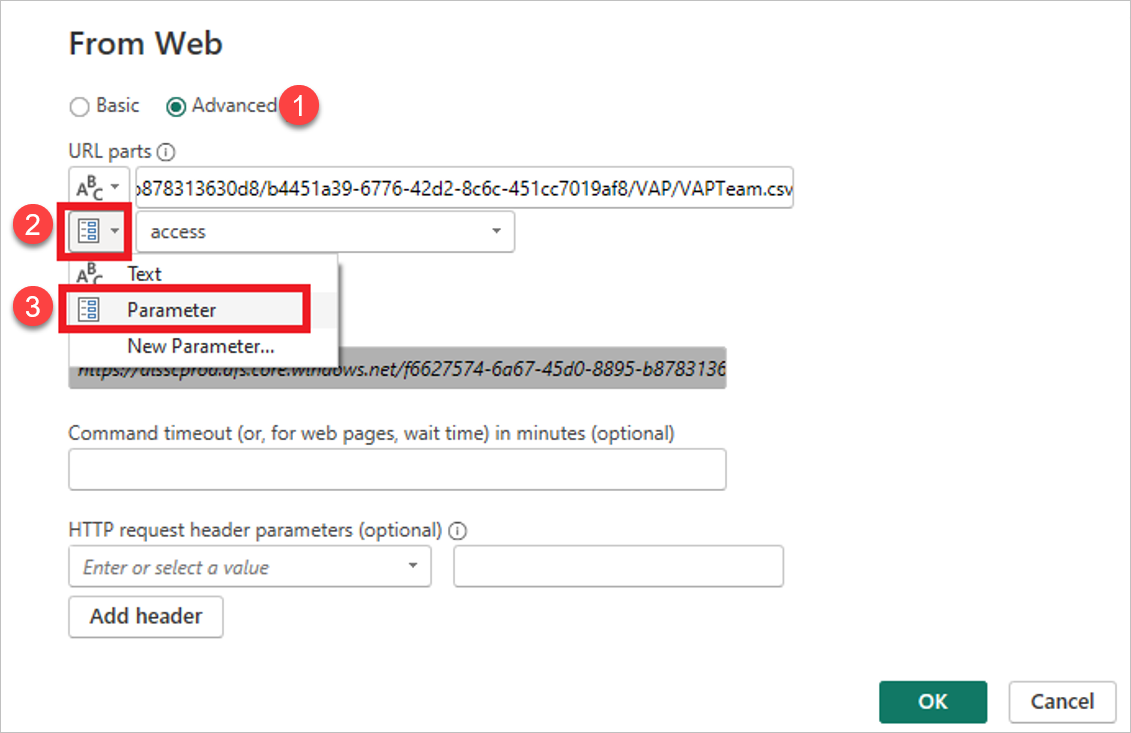
- When entering connection details, use the parameter instead of pasting the token directly.
Enable scheduled refresh in VAP
See the refresh plan details here.
A scheduled or on-demand refresh will fail if:
- The data set schema or structure changed.
- The SAS token expired.
- The data set was deleted.
Update data in Data Workbench and refresh in VAP
To update the data used in the report, upload a new version of the data set in Data Workbench without changing its name or structure. After that, refresh the resource in VAP (scheduled or manual) to load the updated data.