Schema management
Schema manager is where you define schemas for your data. Schemas describe the structure of your datasets, including column definitions, data types, and...
Schema manager
Schema manager is where you define schemas for your data. Schemas describe the structure of your datasets, including column definitions, data types, and validation rules. You can use schemas for data validation in File storage and when uploading datasets.
Schema manager has two tabs:
- Schemas: A list of schemas used in your workspace. This page explains schemas in details.
- Validation rules: Reusable validation rules for your schemas. For details, see data validator page.
To access Schema manager
- Navigate to the Data catalogue page.
- Select Schema manager in the upper right corner.

Schemas tab overview
In the Schemas tab, you can:
- Filter schemas to find the schema you need (1).
- View schemas sorted alphabetically by name by default, or change the sort order (2).
- Sort schemas by their short name (3).
- Sort schemas by their availability, either predefined or custom (4).
- Sort schemas by their Active version (5).
- Sort schemas by their last update date (6).
 To sort by a column (descending or ascending), click on the column name.
In both the Schemas and Validation rules tabs, row actions appear when you hover over a row.
To create a new schema
- In Schema manager, select Create schema in the upper right corner.

- Fill in the Name and, optionally, Short name for the schema. Choose descriptive names that reflect the data you will be working with.
- Optionally, under Description, describe the purpose of this schema and its intended use.
- Select Add column to define a column.
To define columns
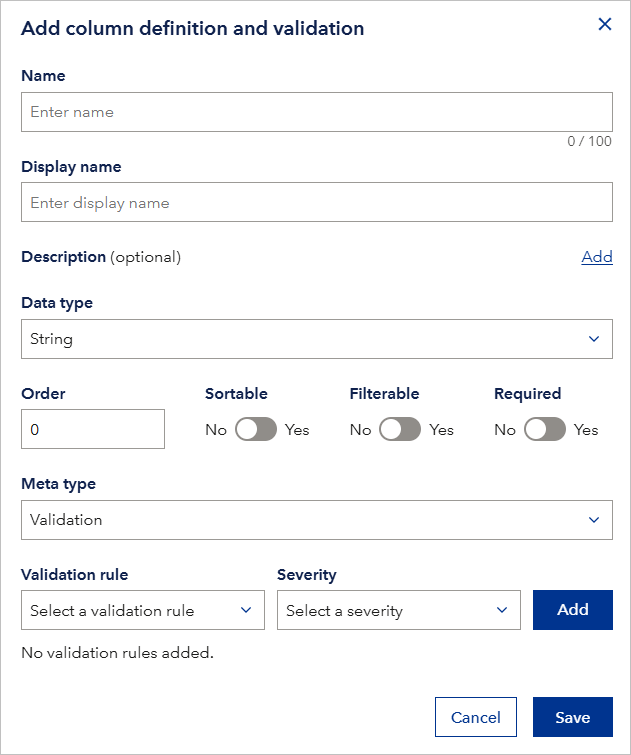
Below is a screenshot of the popup for adding column definition and validation.
For each column:
- Fill in the Name (internal name): this is a required field and should be unique within the schema. It's used for referencing the column in expressions or code.
- Fill in the Display name (user-friendly name): this is how the column will be presented in the user interface. It's limited to 100 characters.
- Optionally, add a Description: for the column to provide more context. Select Add to expand the description field.
- Set the Order of the column in the dataset. '0' means it will be the first column.
- Select the appropriate Data Type (for example, Boolean, Decimal, Float, or Int64) from the dropdown menu. This defines the kind of data the column is expected to hold. Supported numeric types include Decimal, Float, Double, Integer32, and Integer64:
- Use Decimal for exact values. You can configure precision (the total number of digits) and scale (the number of digits after the decimal point).
- Use Float for approximate values requiring about 7 decimal digits of precision.
- Use Double when you need higher approximate precision, about 15–16 decimal digits. For detailed numeric datatype guidance and API-oriented schema information, see Schema management.
- Configure the column properties using the toggles:
- Sortable: Enable if you want users to be able to sort the data by this column.
- Filterable: Enable if you want users to be able to filter the data based on this column's values.
- Filter types: Select filter type. For more details
- Required: Enable if the column must have a value for every row in the dataset. This is a critical validation rule since missing a required column will cause validation to fail.
- Select Save: A toast message will confirm successful saving.
Note that the following dropdowns are related to data validation and we discuss them on the related page:
- Meta type
- Validation rule
- Severity
To edit or create a new version of a schema
- In Schema manager, find the schema you want to edit. You can use filters (Add filter) and sort by schema name, last updated date, or availability.
- Hover over the schema row, then select the pencil icon at the right end of the row. This opens the full-screen schema details page, where schema and version information is displayed and the page actions are at the top.

- In the Schema versions section, you'll see a dropdown menu listing the available versions of the schema. Select the version you want to work on.

- Alternatively, if you want to create a new version based on an existing one:
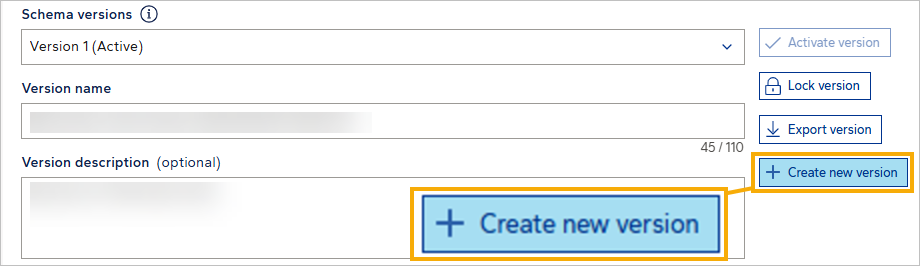
- Select the Create new version button.
- Fill in the Version name and optionally a Version description for the new version. Note that you can select Import version to import a schema (instead of manually modifying it i Data Workbench).
- Select Save. This will duplicate the selected version and let you edit the new version without modifying the original.
- Modify the schema as needed. You can:
- Add, edit, or delete columns in the Column definition and validation section.
- Change the schema Name or Description.
- Use the actions at the top of the column and row tables.
- Toggle the available properties to control which table information is displayed.
- Search for columns by name or display name, and for row validations by name.
- To activate a specific version of the schema:
- Select the desired version from the Schema versions dropdown.
- Select the Activate version button. Data Validator always uses the most recent activated schema version for validating data.
- If you want to discard all changes made during the current editing session, select Reset at the top of the page.
- Once you're satisfied with the changes, select Save at the top of the page to update the schema. After saving, you remain on the schema details page.
To lock a schema
Workspace admins can lock a schema version to prevent unintended edits. To do so, in the Schema versions section, on the right side, select the Lock this version button.
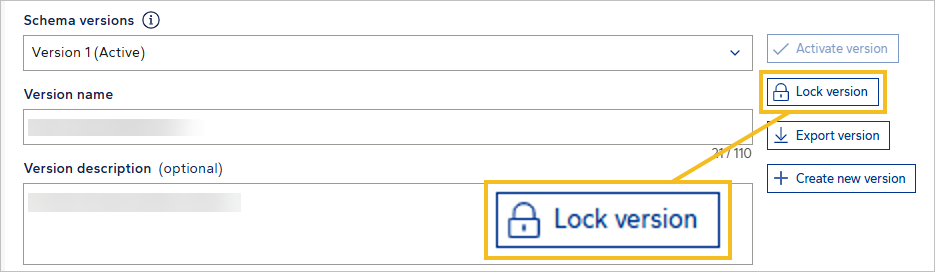
Only locked schemas can be used for dataset upload.
Note that:
- Once locked, the schema version cannot be edited.
- All fields and buttons related to editing will be disabled.
- You can still create a new schema version and make edits there.
- Locking a schema does not affect whether it is active or inactive.
To activate a schema version
A schema can have one active version (the default version). When using Data Validator, this is the schema version that will be used for validation.
To activate a version:
- Open the schema editor for the schema you want to modify.
- Select the desired version from the Schema versions dropdown.
- Select the Activate version button.
Data migration
To export a schema
- In Data catalogue > Schema manager > Schemas, find the schema you want to download. You may use filters and sorting to locate it.
- Hover over the schema row, then select the pencil icon at the right end of the row.
- In Edit schema details, in the top right part of the window, select Export version.

To import a schema
- In Data catalogue > Schema manager > Schemas, in the top right corner, select Create schema.
- In Create schema, in the right corner of the window, select Import version.
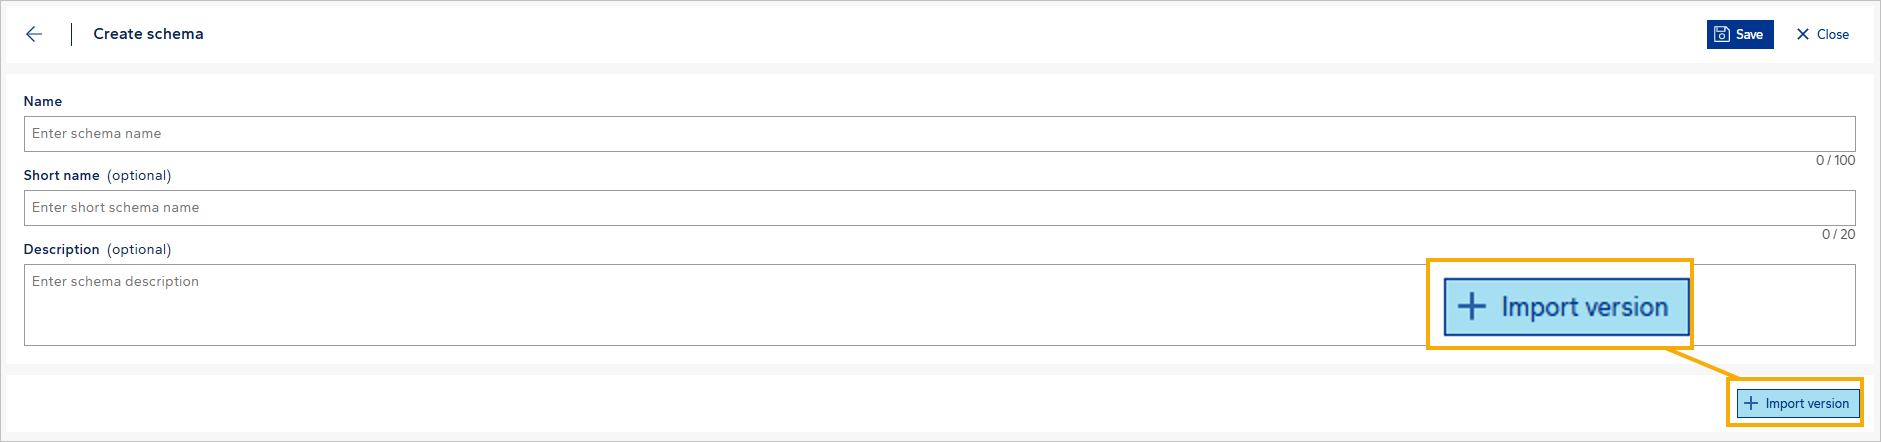
- In the pop-up window that shows, upload the schema and close the popup.
- To save the imported schema, in the top right corner, select Save.